Walkthrough: your first workflow
In this walkthrough you build a small but realistic pipeline and learn the main screens of the editor on the way:
You need a running deployment with an initialized catalogue and at least one registered worker. If you have not done that yet, follow the Quickstart steps 1–4.
Step 1 — Look at the catalogue
Open Warehouse. Its tabs are your catalogue: Workflows, Digital Resources, Workers, Data Kinds, Processor Definitions and (admins only) Data Interface Types.
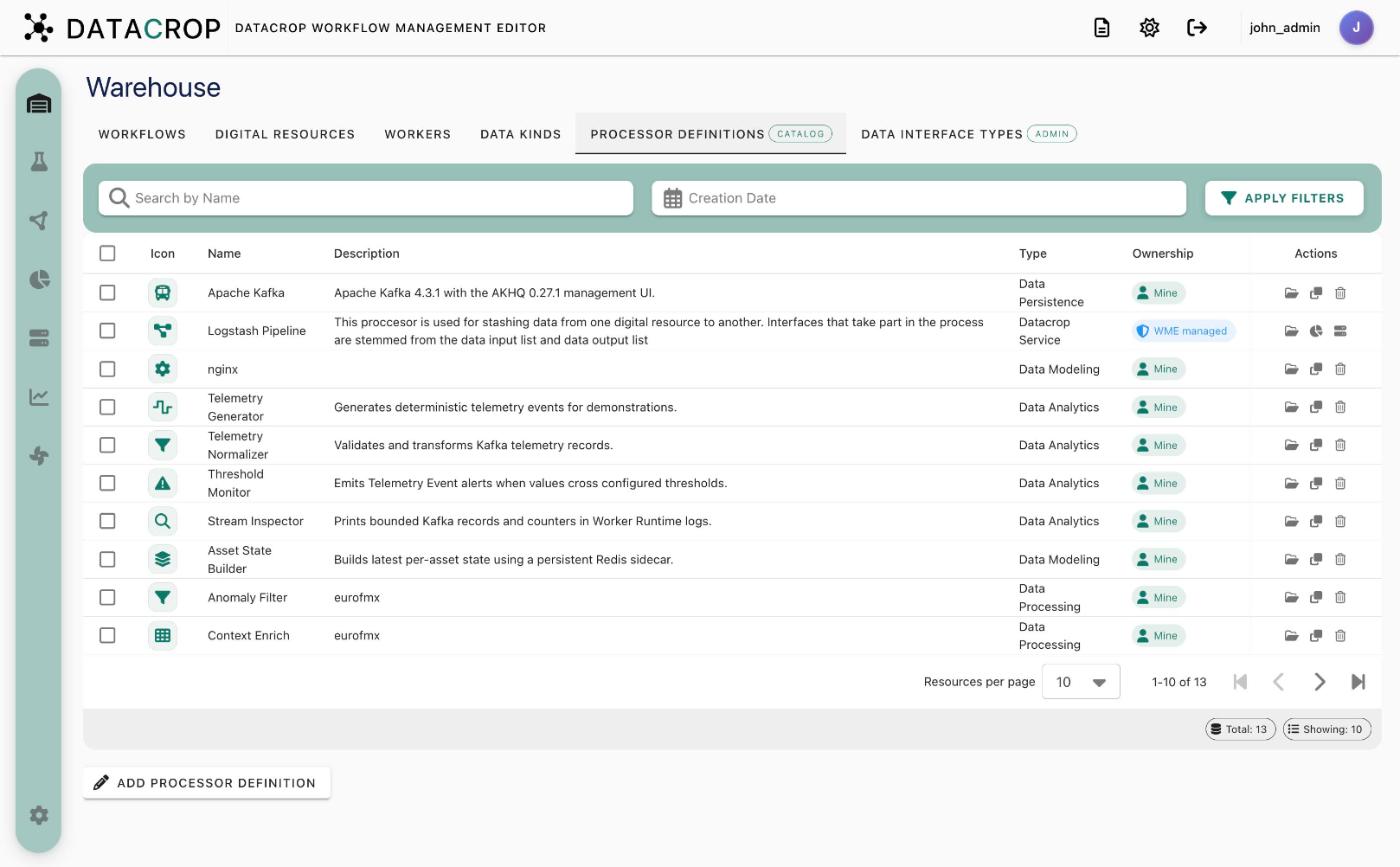
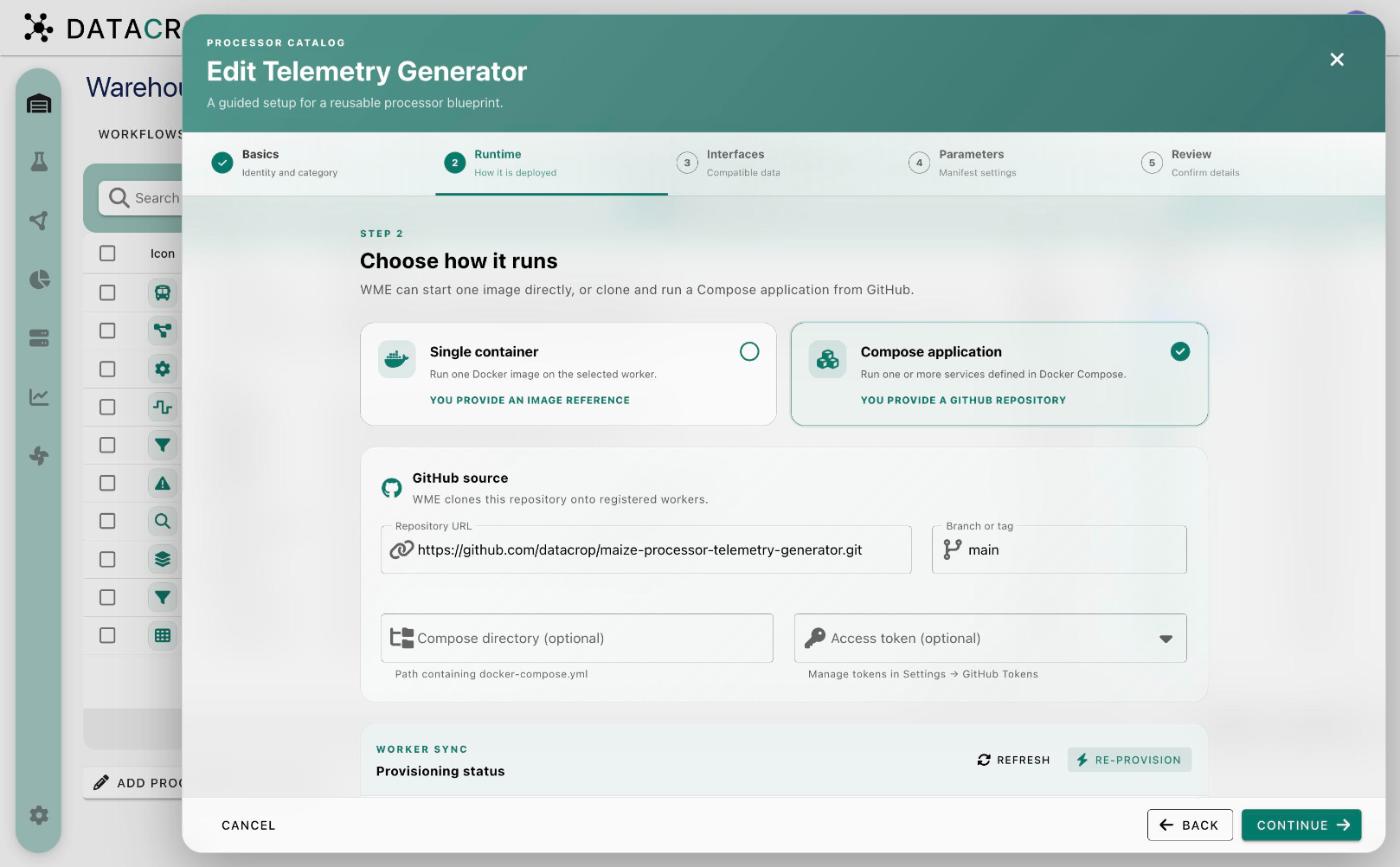
Open Telemetry Generator to see how a processor is described: its Runtime (a Compose application cloned from GitHub), its supported Interfaces and its Parameters, each of which becomes an environment variable. You do not need to change anything — close the wizard with Cancel.
Step 2 — Describe the data
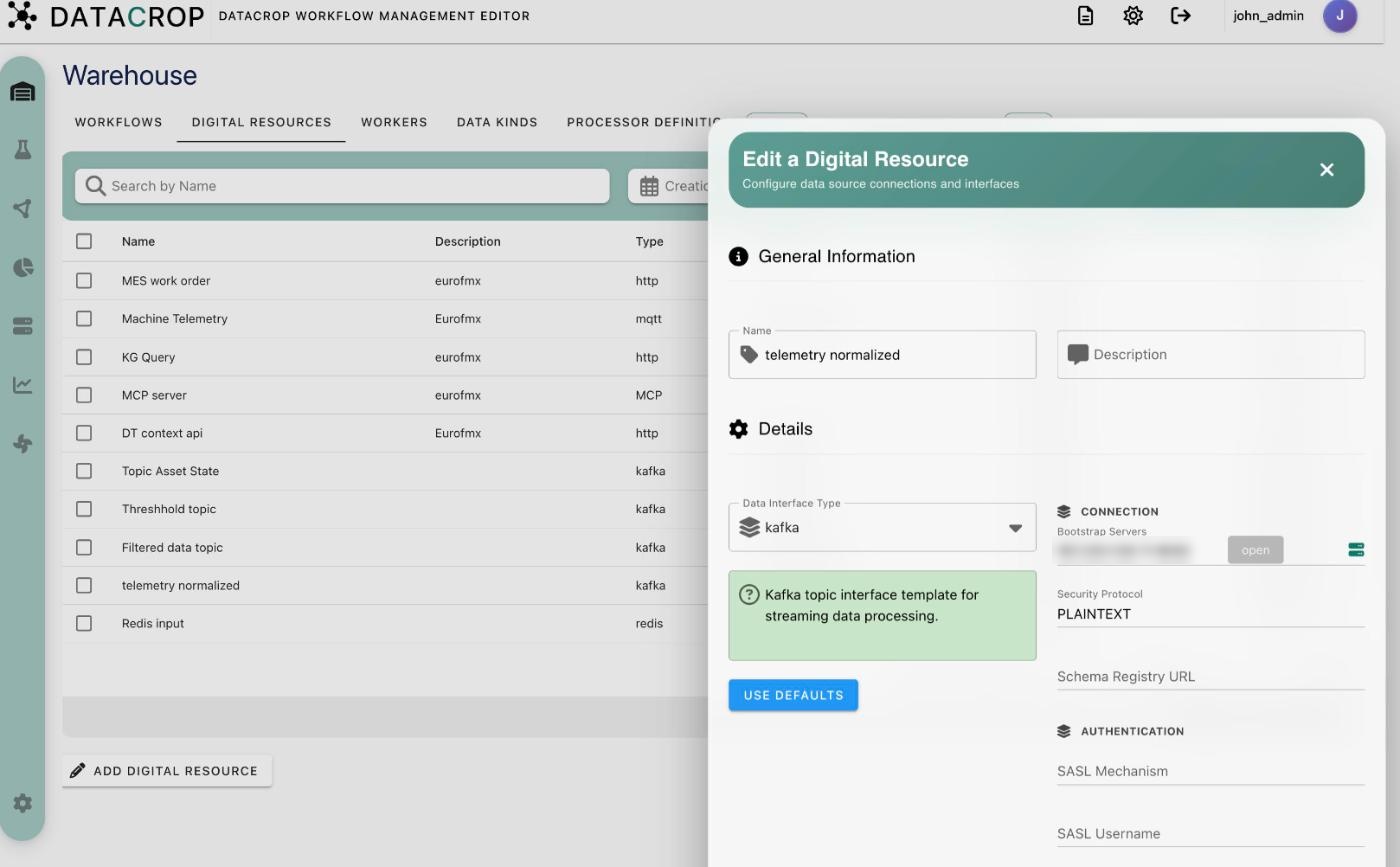
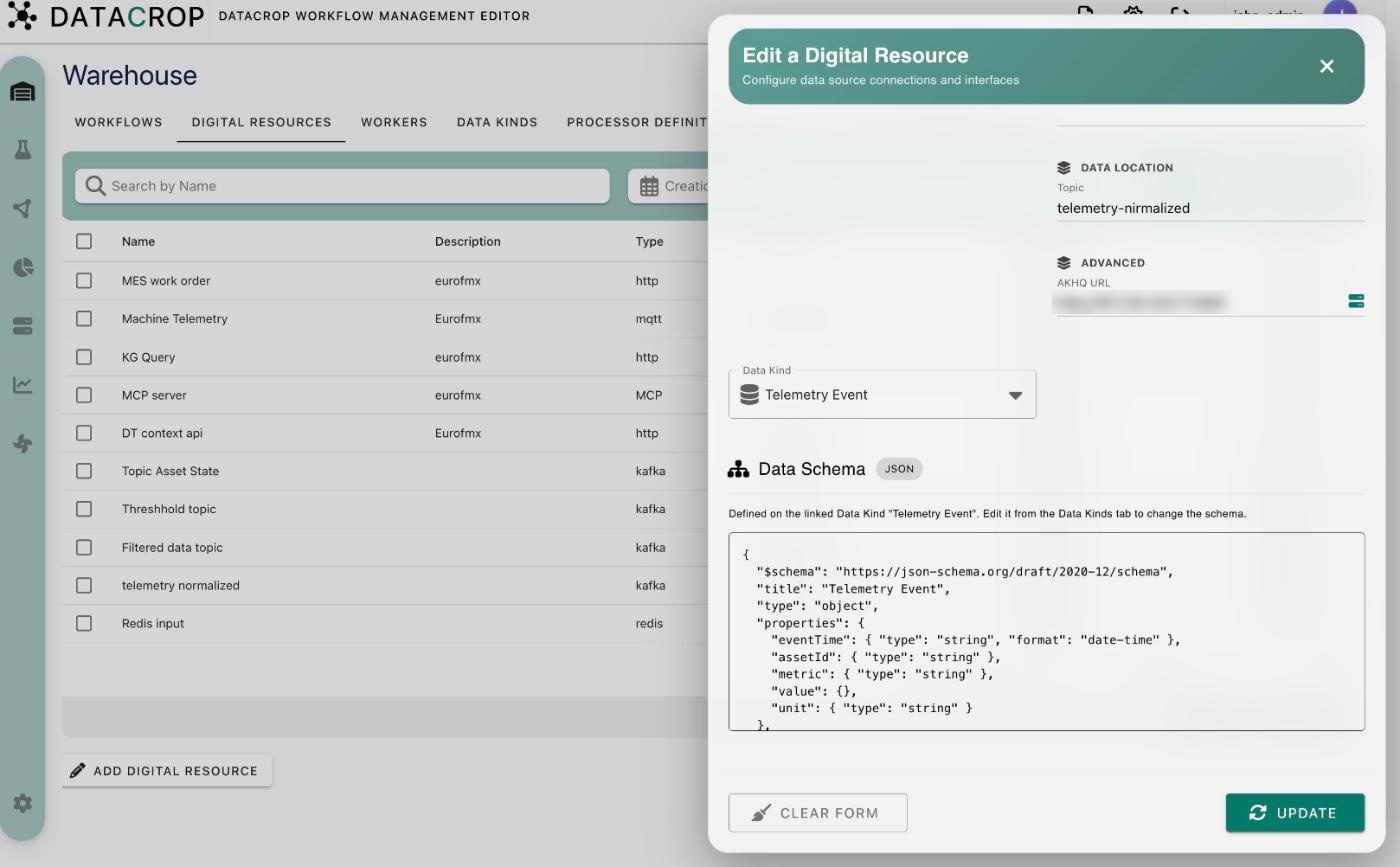
Create three Kafka resources in Warehouse → Digital Resources (telemetry-raw, telemetry-clean, alerts). For each one choose interface type kafka, click Use default WME instance to fill the bundled broker address, set the Topic, and pick a Data Kind (Telemetry Event for the first two, Telemetry Event or a kind of your own for alerts).
The data kind's schema is shown read-only at the bottom of the form, so whoever uses this resource knows what the payload looks like.
Step 3 — Compose the workflow
Workflows → Create New Workflow opens the Workflow Lab.
- On 1. Workflow Details set a name (
Field telemetry) and a description. Leave Requires Scheduler off to run on demand. - Switch to 2. Flow Creator. Drag the three processors from the Presets panel and the three resources from Digital Resources onto the canvas.
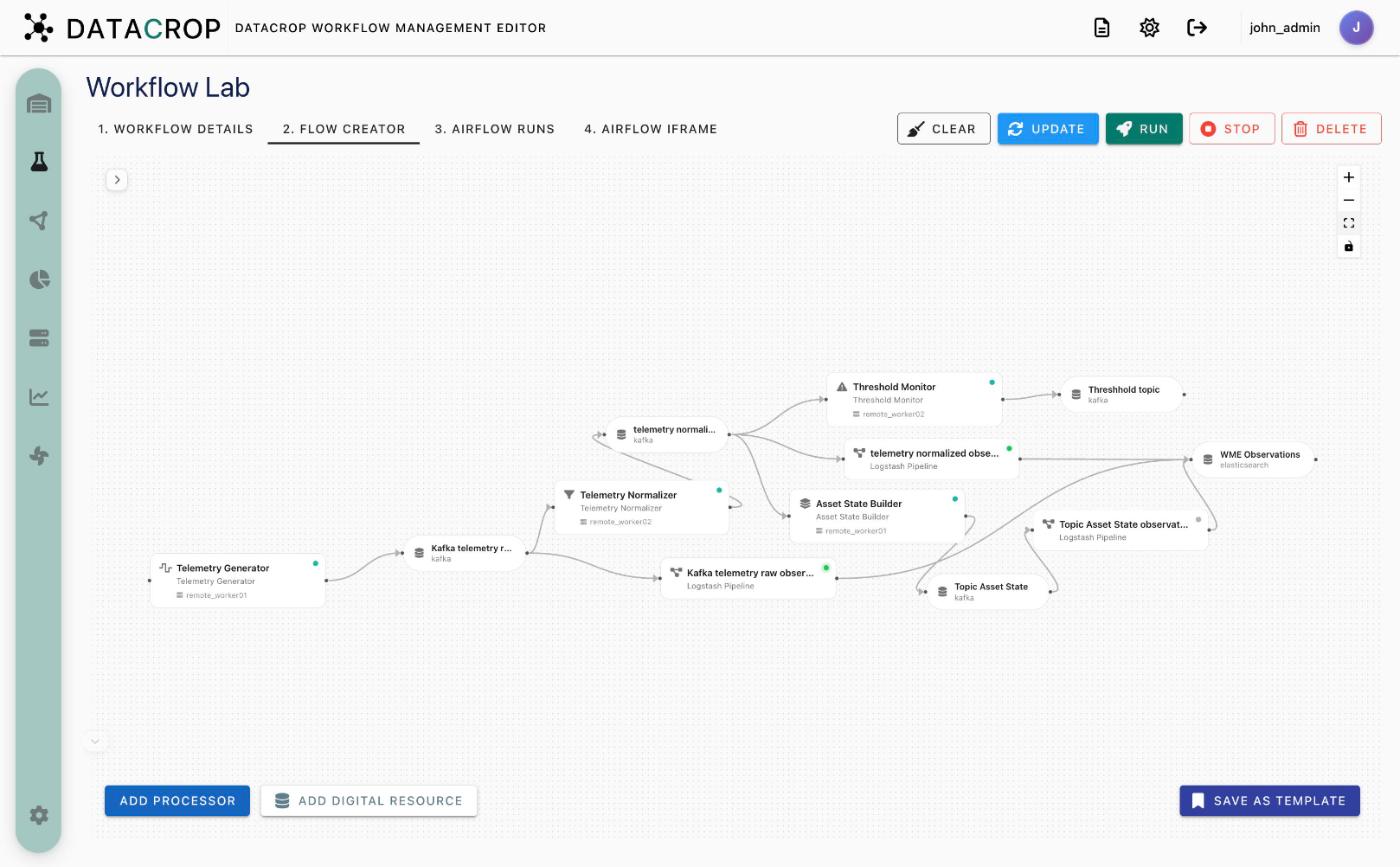
- Connect them as in the diagram above. The editor only lets you draw links that make sense: two resources can never be linked directly, and a resource can only be connected to a processor whose definition supports its interface type. If you drag from one processor straight to another, the Connect processors dialog lets you pick (or create) a resource compatible with both and inserts it between them.
Step 4 — Configure each processor
Double-click a processor to open its form.
- Deployment → Worker Station: the worker this processor runs on. Different processors of the same workflow may run on different workers.
- Data Flow: the input and output resources (already filled from your connections).
- Processor Parameters: the definition's parameters, with their environment-variable names. Use Defaults fills the default values. Set a Consumer group for the normalizer and the threshold monitor.
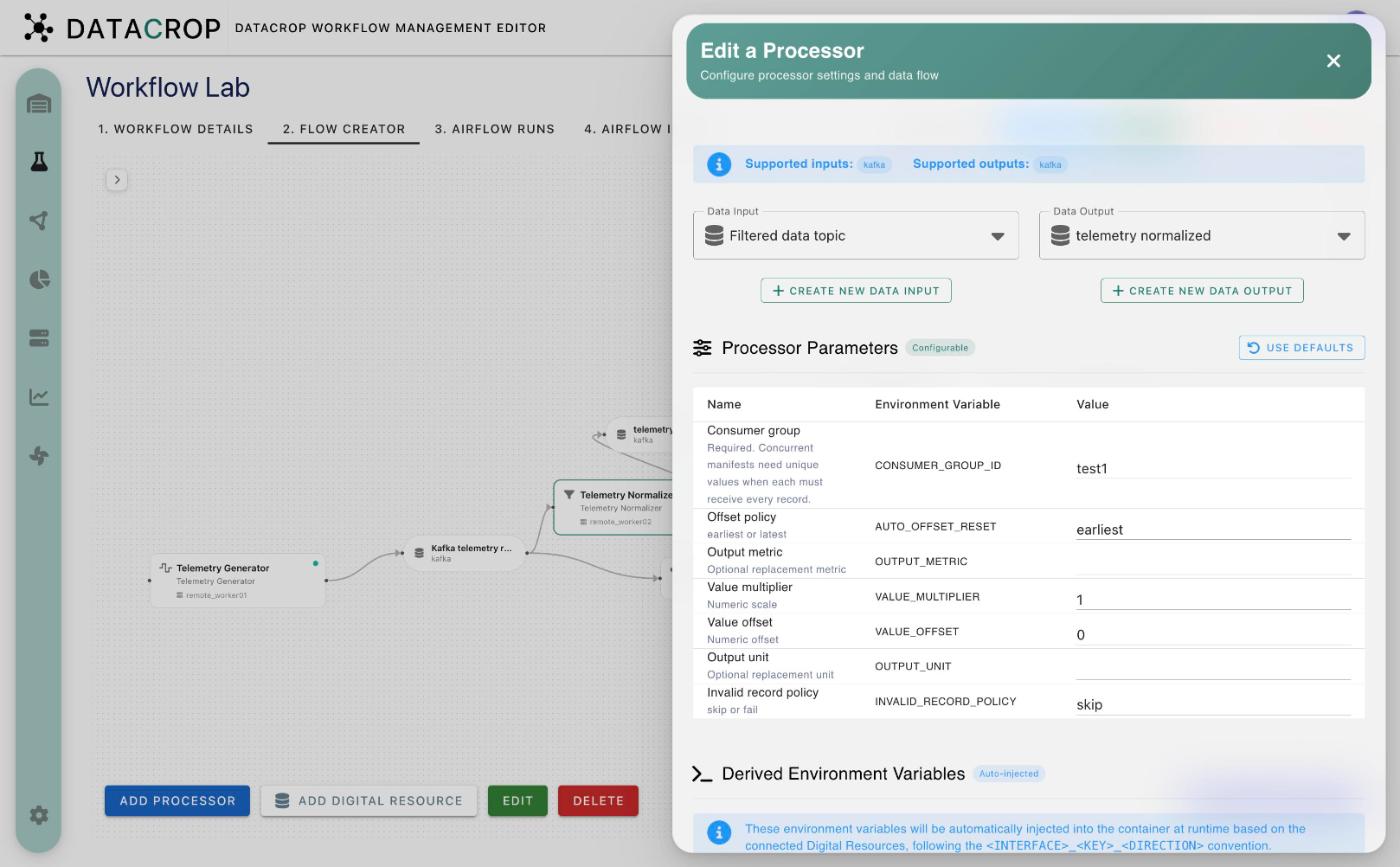
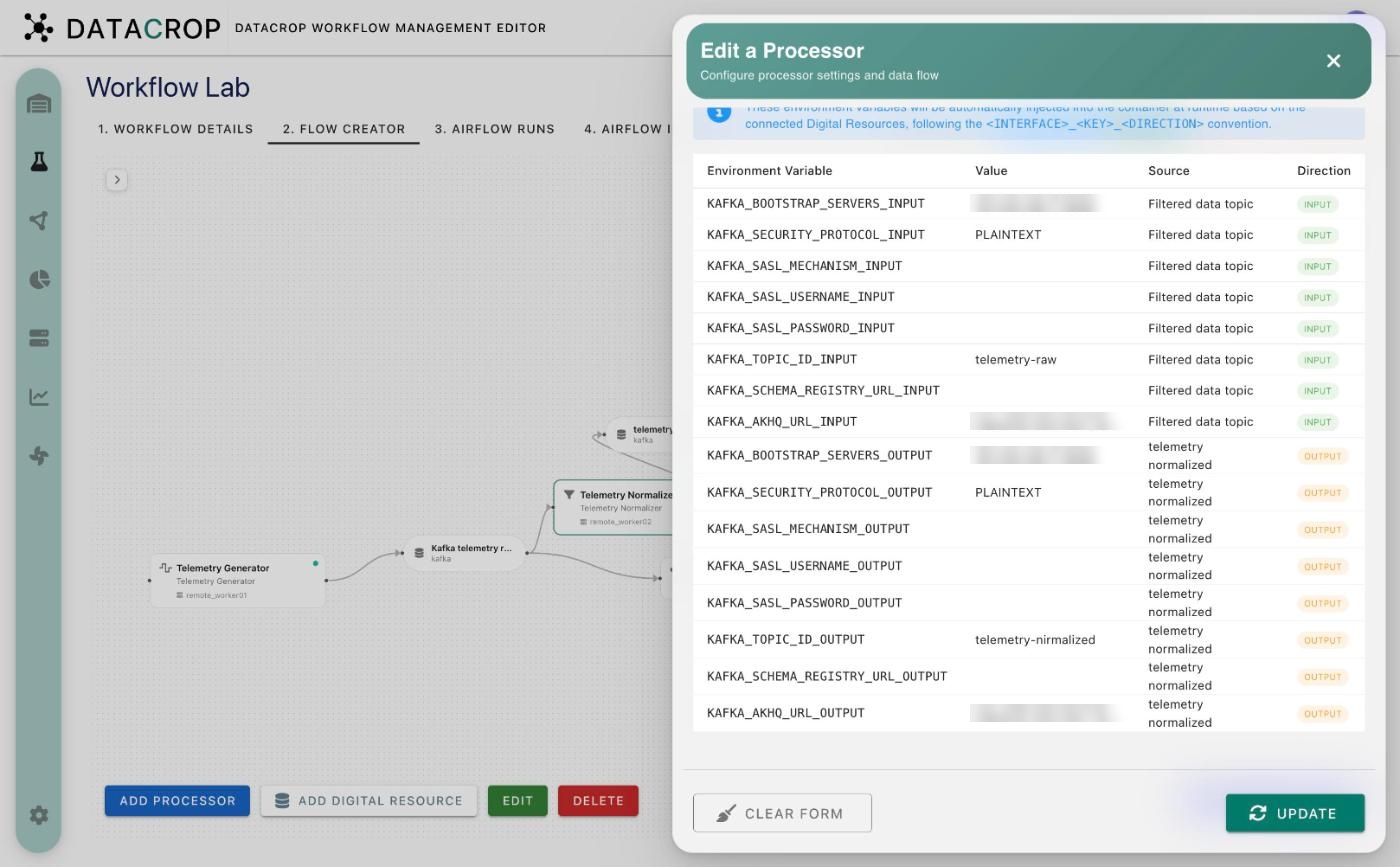
Scroll down to Derived Environment Variables. These are generated from the connected resources and injected into the container at runtime — this is how the normalizer learns which Kafka topic to read and which to write, without you configuring it twice.
Step 5 — Save, run and watch
- Click Save. WME generates a deploy DAG and a teardown DAG and sends them to Airflow and every worker. Run stays disabled for a short countdown while Airflow loads the DAG, and until every processor's code is provisioned on its worker.
- Click Run.
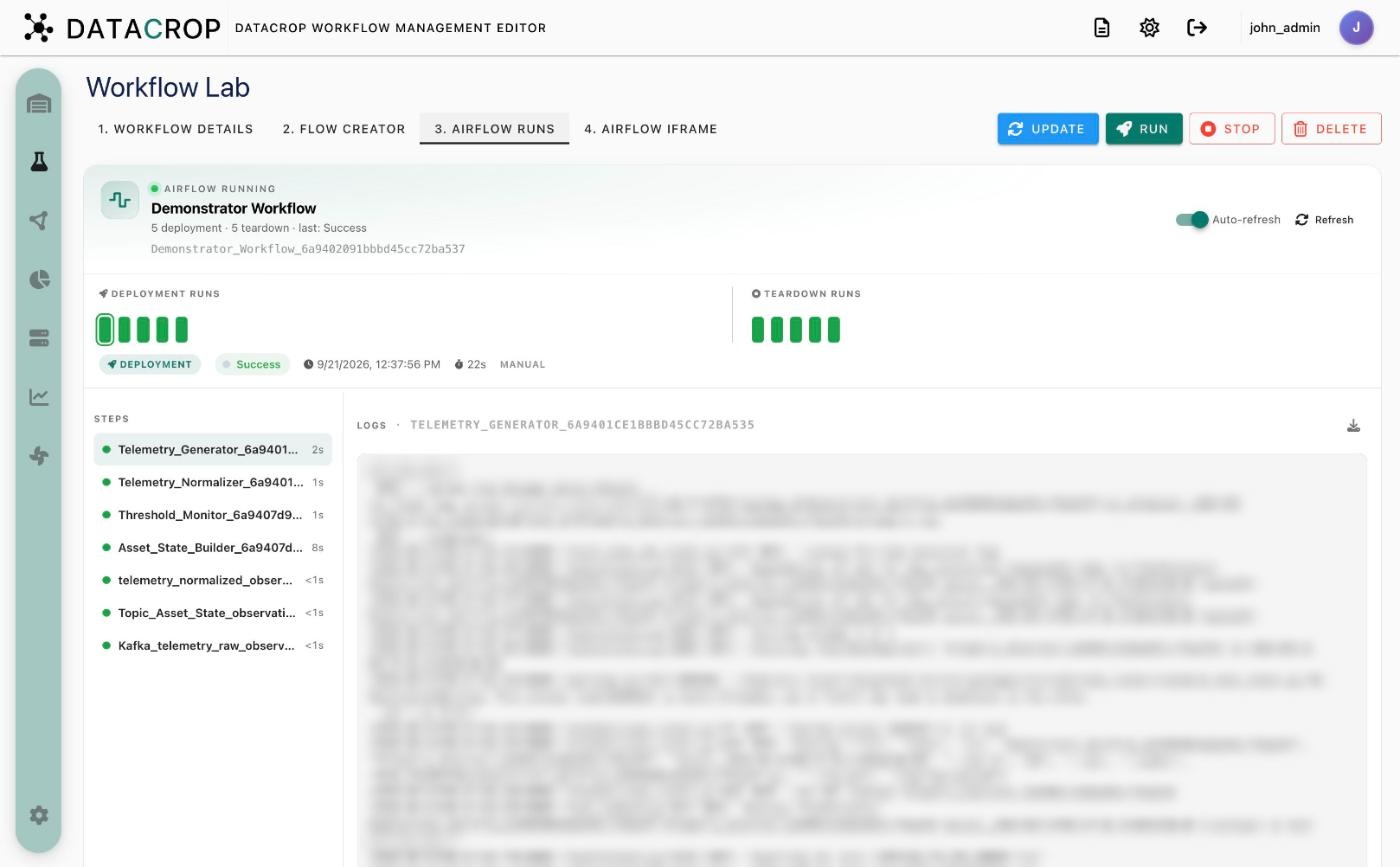
- Open 3. Airflow Runs: each processor is a step; click one to read its log.
- Open Worker Runtime to see the containers on each worker, their health and their output. The generator logs every event it publishes.
Step 6 — Change and stop
- Change a parameter (for example the threshold monitor's WARNING_THRESHOLD), click Update and Run again to redeploy.
- Stop runs the teardown DAG and removes the containers.
- Save as Template (bottom right of the canvas) stores the graph so you can create similar workflows from Warehouse → Workflows → Create Workflow from Template.
What you learned
- Processors and data sources are catalogue objects; workflows connect instances of them.
- Connections become environment variables automatically.
- Saving generates Airflow DAGs; running deploys containers on the chosen workers.
- Airflow Runs and Worker Runtime show you what happened.
Continue with Observe your data.